
Introduction
Artificial intelligence (AI) is currently one of the most potent forces promoting the
innovations to be applied in various industries, but, as far as novices are concerned, the
initial move seems so intimidating. Fortunately, Python has made the work easy. You do
not have to grasp complicated mathematics or create your models; you just require proper
assistance and tools as a neophyte.
This tutorial will help you write the first AI program in Python and a common machine
learning library, Scikit-learn. We will begin by getting our environment ready and create
a simple classifier that will predict based on simple data. You will know by the end what
machine learning really does and how to get it humming and working, and that too
without a PhD.
What You Need Before You Begin
Before writing your first AI program, ensure you have the following installed (as covered
in Day 7):
Python (3.8 or later)
Jupyter Notebook or another IDE like VS Code or PyCharm
Basic packages like scikit-learn, numpy, and pandas
To install the packages, open your terminal or command prompt and run:
pip install scikit-learn numpy pandas
These libraries make it much easier to build, test, and understand machine learning
models. Scikit-learn is particularly popular for educational purposes because of its
simplicity and power.
Let’s Start with Basic Python Code
Before jumping into AI, let’s warm up with some simple Python examples.
Example 1: Hello World
print(“Hello AI World!”)
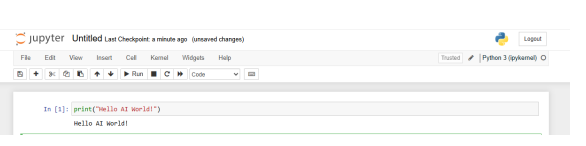
A classic starting point for any programming language.
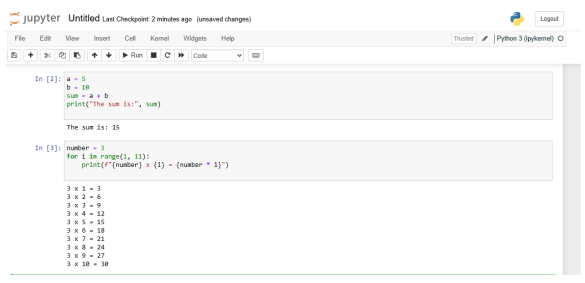
Example 2: Simple Addition
a = 5
b = 10
sum = a + b
print(“The sum is:”, sum)
This shows how Python handles basic arithmetic operations.
Example 3: Multiplication Table
number = 3
for i in range(1, 11):
print(f”{number} x {i} = {number * i}”)
Great for practicing loops and formatted printing
Example 4: User Input
name = input(“Enter your name: “)
print(“Welcome to AI, ” + name + “!”)
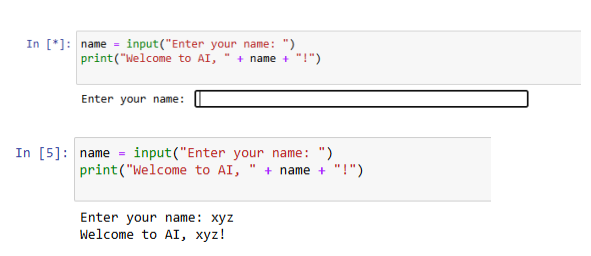
This introduces interaction and makes your script dynamic.
These examples form the building blocks of logic and syntax you’ll need to understand
more advanced AI programs. Python’s clean syntax is one of the reasons it’s the go-to
language for AI development.
Writing the Code – Your First AI Program
Now, let’s move forward with your first real AI program using a Decision Tree classifier.
This is a simple supervised learning algorithm that splits data based on feature conditions
to make predictions.
from sklearn import tree
Sample data: [height (cm), weight (kg)]
X = [[160, 50], [165, 65], [170, 70], [155, 45], [185, 90], [175, 85]]
Labels: 0 = female, 1 = male
y = [0, 0, 1, 0, 1, 1]
Train the decision tree classifier
clf = tree.DecisionTreeClassifier()
clf = clf.fit(X, y)
Make a prediction
print(“Predicted class:”, clf.predict([[167, 65]]))
Important: Don’t forget to import tree from sklearn as shown. If you skip the import
statement, Python will throw a NameError.
Output:
Predicted class: [0]
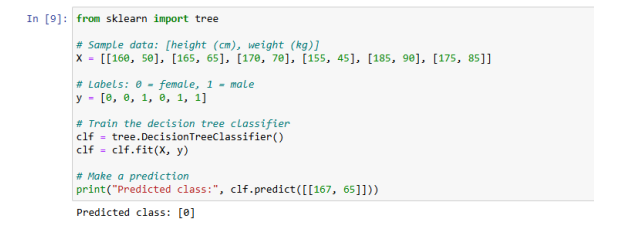
This result means that the classifier predicted the person is female (label 0), based on the
height and weight values.
Understand What Just Happened
You’ve just implemented a supervised machine learning model. Here’s how it works:
Input Features: Height and weight.
Labels: Gender (0 = female, 1 = male).
Training Phase: The model observes the patterns between features and labels.
Prediction: Given a new input, it makes a classification based on learned
patterns.
This mirrors how more complex AI models function in real-world applications like spam
detection, recommendation systems, and voice recognition.
Try It Yourself – Experiment with New Inputs
Let’s make some more predictions to see how our model performs with different data
points:
print(clf.predict([[180, 88]]))
print(clf.predict([[150, 42]]))
Each prediction uses the logic that the model learned from the training data. This type of
model can be used in thousands of scenarios, such as:
Identifying spam emails
Predicting customer churn
Recommending movies
Try tweaking the numbers and see how it affects the results
Visualizing the Decision Tree
Understanding how your AI model makes decisions is critical. Visualization provides that
insight.
from sklearn.tree import plot_tree
import matplotlib.pyplot as plt
plt.figure(figsize=(10,6))
plot_tree(clf, filled=True, feature_names=[“Height”, “Weight”])
plt.show()
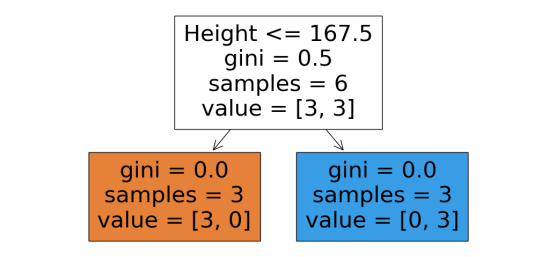
This will generate a tree diagram showing the decision paths used by the classifier. Each
node shows a condition on the features and how the data splits. This is extremely useful
for debugging and teaching.
Practical Uses of This Model
While this model is simplistic, it reflects foundational concepts in AI. Here are some realworld ways this type of AI logic is applied:
Medical Diagnosis: Predicting illness based on symptoms
Banking: Approving loans based on customer profile
Retail: Recommending products based on purchase history
Understanding the pipeline from data to prediction empowers you to work on these larger
applications later.
Recap: What You Learned Today
Basics of writing Python programs: printing, math, user input, loops
How to install necessary machine learning libraries
What supervised learning is and how it works
How to train a Decision Tree model using Scikit-learn
How to make predictions based on new data
How to visualize your model’s logic
You’ve officially created your first working AI program in Python!
This hands-on experience gives you a strong foundation to continue learning about more
complex models like KNN, SVMs, or Neural Networks.